WebEx support
A WebEx meeting is an online meeting that allows you to virtually meet with other people, without leaving your home or office.
WebEx meetings require a computer with Internet access. By logging into the meeting via the Internet, you will be able to see the presenter’s computer screen. By calling into the conference phone number, you will be able to hear the presenter and other participants.
Please note: The first time you use WebEx, please allow yourself approximately five minutes to log in and get setup as your computer will need time to automatically download the free WebEx plugin that will allow you to join the meeting.
How to use WebEx
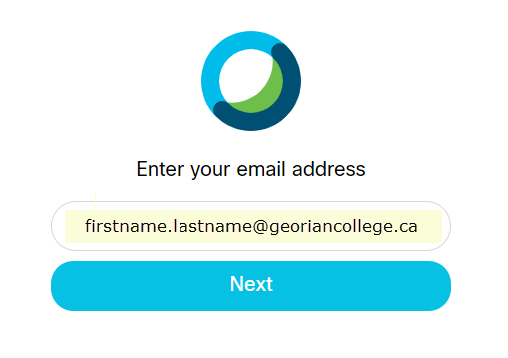
1. Go to https://georgiancollege.webex.com. Click the Sign in button.

2. Enter your Georgian College email address.
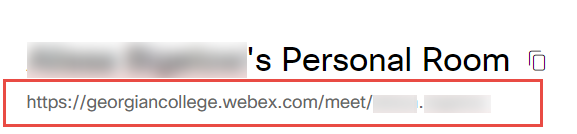
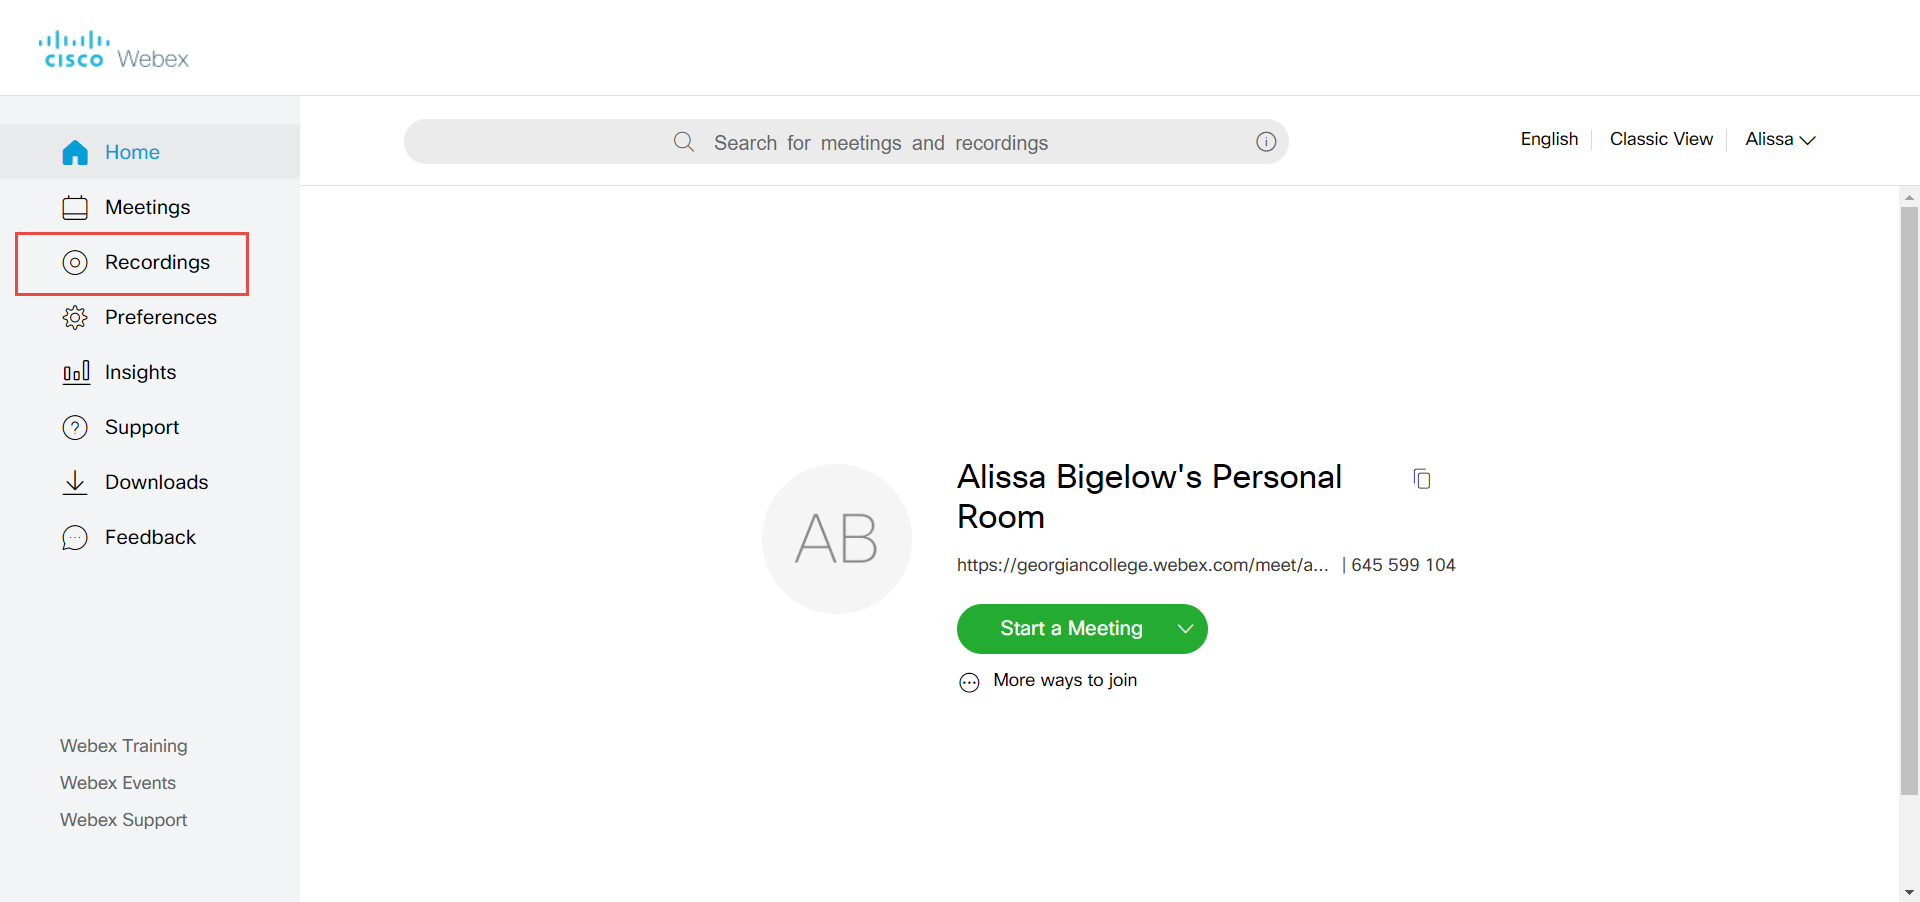
3. You will be presented with your Meeting Dashboard. Note that you have a personal room URL that you can use with your students.

4. If you would like to use WebEx for office hours or general Q& A with your students, you can post this URL in Blackboard.
5. To schedule a virtual classroom immediately, you can select Start a Meeting or you can set up a session for a later date/time using the Schedule button in the middle of the screen. To manage and see a list of your scheduled sessions, you can use the the Meetings tab in the menu on the left. You will be presented with a unique URL for each meeting that you schedule, which can be posted via Blackboard for the students within the specific course.

If you can manage the time, it may be beneficial to set up an informal “hello” type session sometime this week to simply connect with your students. This will give them, and yourself, the opportunity to connect to your room to check their connection and audio settings. It would also be a good time to check out the chat feature. They don’t have to stay long. You can also practice with the features of WebEx (sharing your screen, muting participants, etc.) without the pressure of a “formal” session.
There is also a test WebEx site that anyone can log into at any time in an effort to lessen the anxiety about using WebEx from their device. First time login will ask the participant to run the WebEx app. Having this setup prior to a formal class session will save time and connection hassles when trying to join at the specified time. Anyone, including yourself, can go to this website and join a practice meeting to ensure you have the app installed, your speakers and microphone are working, and to become familiar with the environment and its tools.
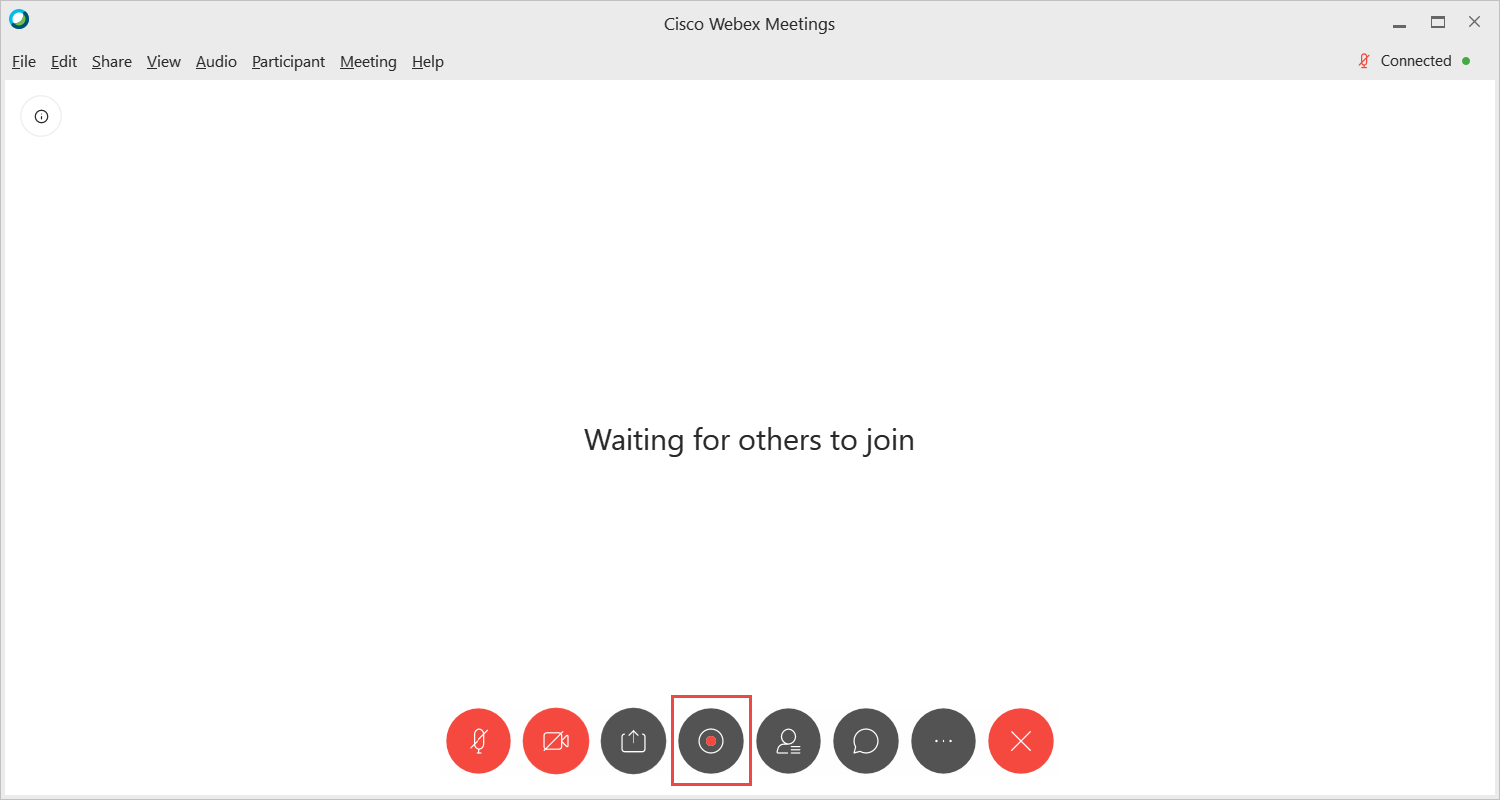
Once you start a session you will be able to record it and save it to the WebEx cloud or your computer.
Log in and start a meeting.
Click the Record button at the bottom on the screen.
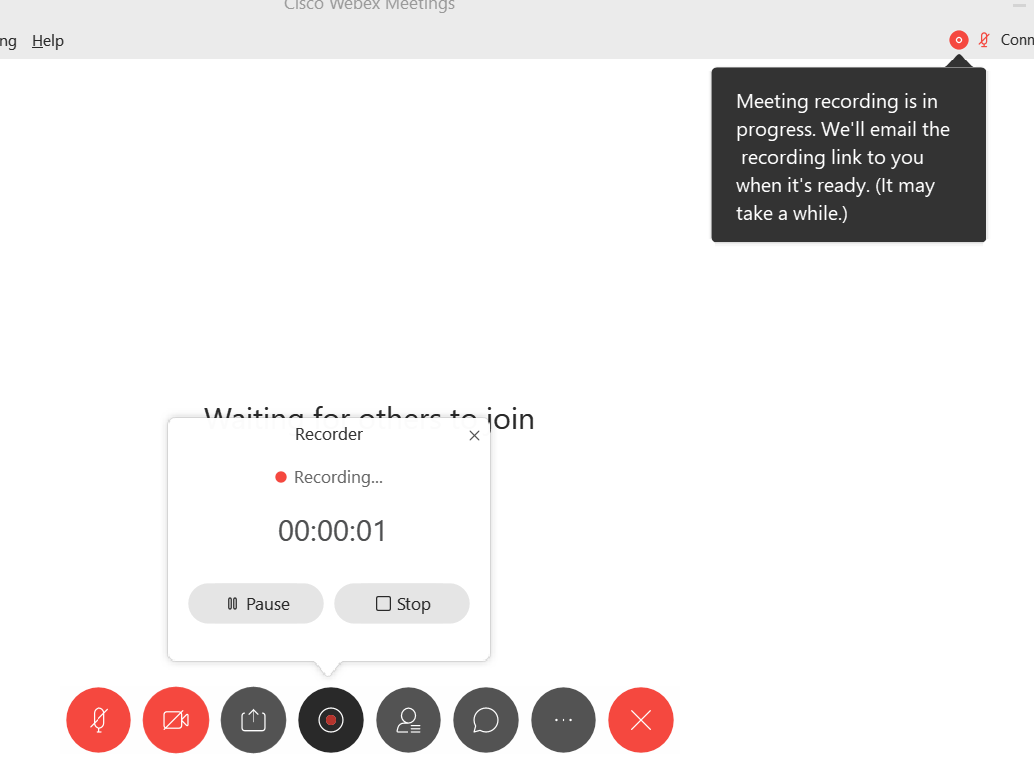
Choose to save it “In the cloud” or as a file “to your computer.”
- If you choose In the cloud, you will see an information bubble in the upper right corner of your screen (image). It will tell you that you will receive a link to the recording when it is ready. Depending on the length of the recording this can take a few minutes, up to a few hours. Try to keep the recordings as short as possible.
- If you choose to save to your computer, you will be prompted to save the file to a location on your computer. For ease of access to the file after the recording you can save to the desktop.
4. To see a list of your recordings and access the URLs that can be posted to Blackboard for your students to access, return to the WebEx dashboard and choose Recordings from the menu on the left.
To announce a session to the students
1. Log in to your WebEx. Instructions can be found on the Georgian CTL homepage.
2. Copy your personal room address from the WebEx dashboard.
3. Enter your Blackboard course shell.
4. Create a new announcement (this will be emailed to your students as well).
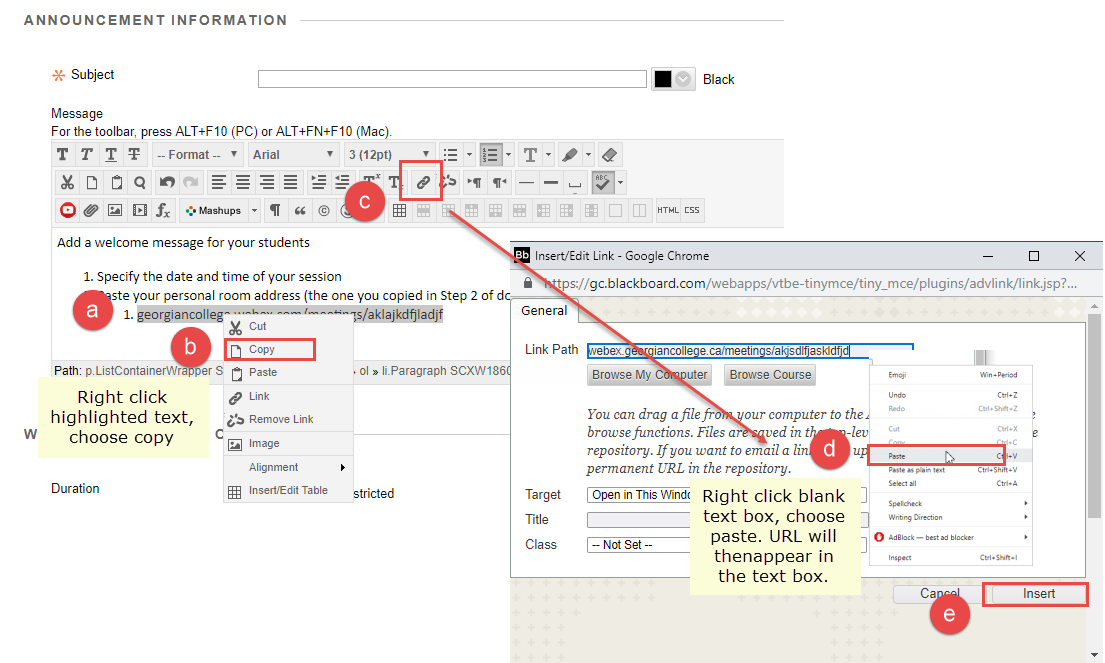
5. In the Bb text editor, add your welcome message and specify the date and time of your session.
6. Paste your personal room address (the one you copied in step two above).
7. Take the extra step of turning that address into a link (makes it a lot easier for the students).
a. In the Bb text editor, highlight the text for the URL.
b. Right click the highlighted text and choose copy.
c. Click the link icon in the text editor.
d. Right click and choose paste into the link textbox.
e. Click the Insert button.
8. In the announcement, tell the students that you will be opening the room 30 minutes before the session start time to allow them to check their connection and audio settings (microphone and speaker). Audio is the trickiest part in any web conferencing.
9. Advise the students to use headsets or earphones.
10. Click on Send a copy of this announcement immediately so that students get a copy of the announcement in their email as soon as you click the Submit button.
11. Submit the announcement.
- Don’t use it to replace your class. Many students will not have access to reliable internet, computers, etc. You can lecture here but will need supplemental information for those students.
- Consider multiple virtual office hours where students can ask questions.
- Record your sessions for those who aren’t able to participate.
- Consider turning on your camera.
- Practise! you can send your personal room link to anyone (CTL will practise with you!).
- You might also try hosting a session with your colleagues before doing a session with your students. Maybe create a group of three or four where each of you can take turns practising hosting.
- Use a headset or earphones if you can. This will make a huge difference.
- If you can, do your session in a quiet room. Check your background; your camera will show pictures behind you, books on your shelves, etc. Make sure you are satisfied with whatever is being shared by the camera. Similarly, if you will get sharing content on your computer screen, make sure your desktop won’t show anything (e.g. files, pictures, etc.) that is private.
- Make sure your microphone is muted when you need it to be muted.
Video resources
Getting started: Log in and start a meeting
This is a screencast that will demonstrate how to login to WebEx, start a meeting and communicate the URL to your students using Blackboard.
Navigating the WebEx environment and controls
This is a screencast that will demonstrate how to navigate the WebEx environment and use the tools available to host a remote session.
Recording and sharing WebEx sessions
This is a screencast that will demonstrate how to record a session and share the link with your students.
Scheduling WebEx sessions in Blackboard
This is a screencast that will demonstrate how to schedule WebEx sessions from within your Blackboard courses.
How to invite guests to your Blackboard WebEx sessions
This is a screencast that will demonstrate how to invite guests to your Blackboard WebEx sessions.
How to meet with student one-on-one
This is a screencast will show you how to meet with students one-on-one on WebEx (e.g. office hours, tutorials, etc,).